From time to time you will need to test URLs, which can sometimes be restricted from anonymous visits. The types and resources can vary be it corporate libraries, knowledge bases, targeted forums, or other. All tend to have limited/restricted access.
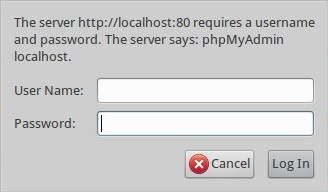
Example -> if you download something from a ftp server, you would come face to face with the "gatekeeper" screen below. This pop-up window is generated by a browser when the server requires a username/password.
The frame may vary from browser to browser (Firefox, Safari, IE), but the main idea is that username/password is required for attaining access to some often basic resources.
This is where the name "HTTP Basic Authorization" comes from. And you definitely need to know how to handle this when working with JMeter tests.
A few words about basic authentication before scripting. If we turn to Wikipedia, we know that basic access authentication is a method for an HTTP user agent to provide a user name and password when making a request.
Why even discuss it? Why not simply use the POST request to access some resources?
The reason is simple: if we wanted to use POST requests to access resources on the servers which have limited access, then we should implement the login page to access user credetials.
But this approach approach makes it all overly and unnecessarily complex.
HTTP Basic authentication (BA) implementation is the simplest technique for enforcing access controls to web resources because it doesn't require cookies, a session identifier and login pages.
So, we do need to know how to deal with such situations while doing performance testing.
Let's see how to do thi using a local installation of phpmyadmin.
(This web-application is used for managing MySQL database without writing SQL queries.)
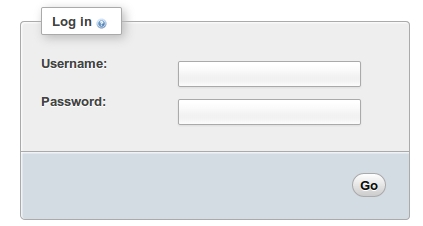
*Note, that by default phpmyadmin uses the login screen.
To change this behavior and to use basic authentication, you need to change config.inc.php (for Linux it is placed in /etc/phpmyadmin).
Find the following string in it:
$cfg['Servers'][$i]['auth_type'] = 'cookie';
and edit to the following view:
$cfg['Servers'][$i]['auth_type'] = 'http';
Ok. Now look at JMeter.
Among other elements, we have the HTTP Authorization Manager.
The Authorization Manager lets you specify one or more user logins for web pages that are restricted using server authentication. You see this type of authentication when you use your browser to access a restricted page, and your browser displays a login dialog box.
JMeter transmits the login information when it encounters this type of page.
Note, that Authorization headers are not shown in the View Results Tree Listener, so we won't be able to check their values from the test-script.
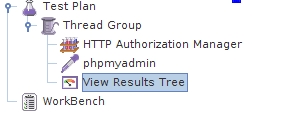
Teeny, tiny overview of the test-script before diving deep in details:
Now, we'll check out the HTTP Authorization Manager. Which fields does it have?

Three fields should be taken care of in our case.
The Base URL is the link to the resource we want to gain access to.
Username and password should be defined.
We've disabled the HTTP Authorization Manager during the first run.
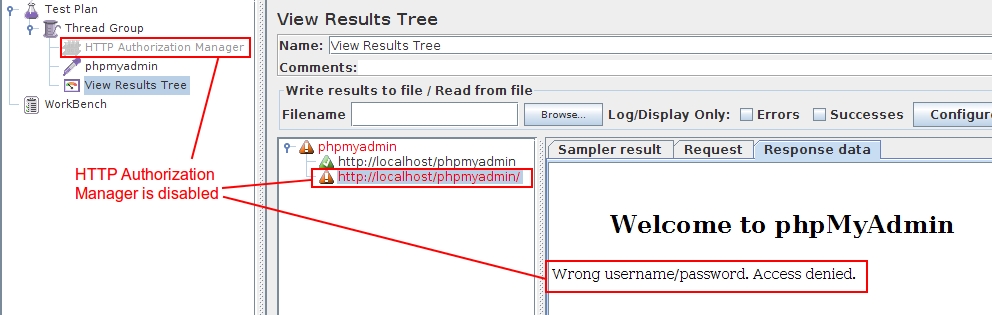
The system does not give us access to the resources. Now, let's see how it works with the HTTP Authorization Manager enabled.
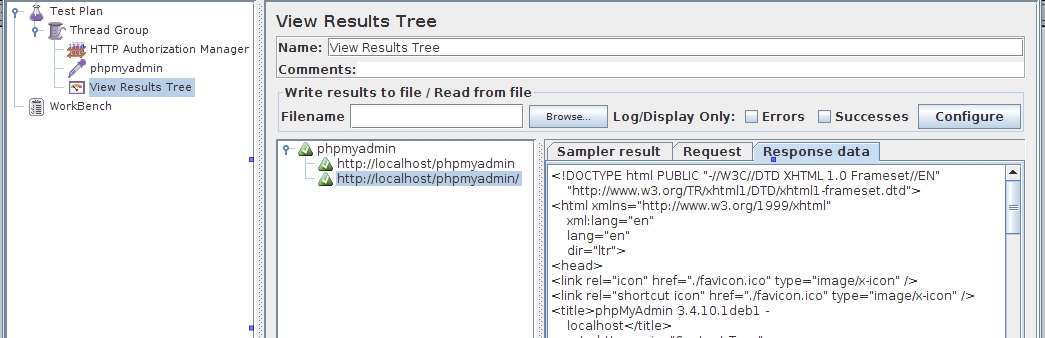
Now everything is a-ok. The server has given us authorization and JMeter has received the HTML as a response.
Example -> if you download something from a ftp server, you would come face to face with the "gatekeeper" screen below. This pop-up window is generated by a browser when the server requires a username/password.
The frame may vary from browser to browser (Firefox, Safari, IE), but the main idea is that username/password is required for attaining access to some often basic resources.
This is where the name "HTTP Basic Authorization" comes from. And you definitely need to know how to handle this when working with JMeter tests.
A few words about basic authentication before scripting. If we turn to Wikipedia, we know that basic access authentication is a method for an HTTP user agent to provide a user name and password when making a request.
Why even discuss it? Why not simply use the POST request to access some resources?
The reason is simple: if we wanted to use POST requests to access resources on the servers which have limited access, then we should implement the login page to access user credetials.
But this approach approach makes it all overly and unnecessarily complex.
HTTP Basic authentication (BA) implementation is the simplest technique for enforcing access controls to web resources because it doesn't require cookies, a session identifier and login pages.
So, we do need to know how to deal with such situations while doing performance testing.
Let's see how to do thi using a local installation of phpmyadmin.
(This web-application is used for managing MySQL database without writing SQL queries.)
*Note, that by default phpmyadmin uses the login screen.
To change this behavior and to use basic authentication, you need to change config.inc.php (for Linux it is placed in /etc/phpmyadmin).
Find the following string in it:
$cfg['Servers'][$i]['auth_type'] = 'cookie';
and edit to the following view:
$cfg['Servers'][$i]['auth_type'] = 'http';
Ok. Now look at JMeter.
Among other elements, we have the HTTP Authorization Manager.
The Authorization Manager lets you specify one or more user logins for web pages that are restricted using server authentication. You see this type of authentication when you use your browser to access a restricted page, and your browser displays a login dialog box.
JMeter transmits the login information when it encounters this type of page.
Note, that Authorization headers are not shown in the View Results Tree Listener, so we won't be able to check their values from the test-script.
Teeny, tiny overview of the test-script before diving deep in details:
Now, we'll check out the HTTP Authorization Manager. Which fields does it have?
Three fields should be taken care of in our case.
The Base URL is the link to the resource we want to gain access to.
Username and password should be defined.
We've disabled the HTTP Authorization Manager during the first run.
The system does not give us access to the resources. Now, let's see how it works with the HTTP Authorization Manager enabled.
Now everything is a-ok. The server has given us authorization and JMeter has received the HTML as a response.
No comments:
Post a Comment